This week, the Tarawi Shirt is 15% off as part of our pre-order.
This is another View A of the new Tarawi Shirt pattern, and one that I had whipped up as a toile from this brushed cotton which I got on sale. It was so snuggly that I had to turn this toile into a finished shirt.
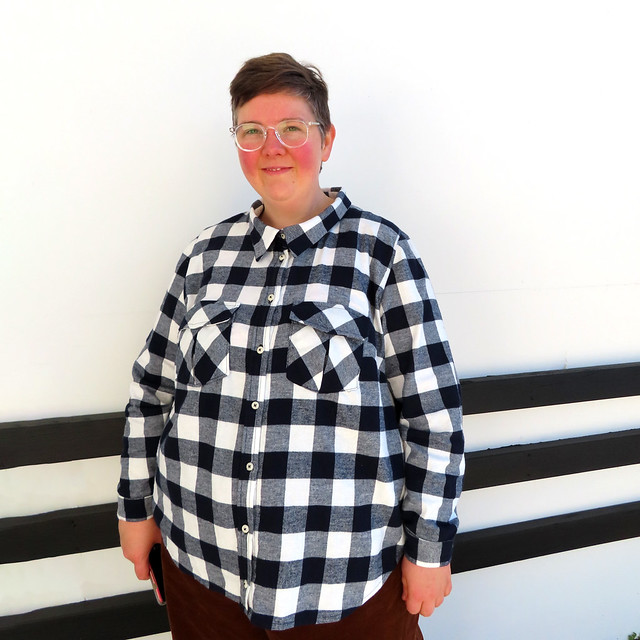
My measurements: Upper bust 43″, full bust 48″, largest measurement 56″, lower hip 55″. You can read more about my size choice for the Tarawi Shirt here.
Size details: I made a Size D, based on my upper bust measurements, and used the 2+ front. I graded out to a little past the Size E hip to accommodate for my largest measurement. The narrow neck option didn’t exist when I made this, but I’d choose that option for my narrow neck next time.
Fabric and notions: I got this Brushed Gingham Twill Cotton on sale from The Fabric Store for $12 per metre (no longer on sale). I actually bought 7 metres while it was on sale- and because I got it for such a steal, I decided to use it for a toile (obviously, I didn’t need 7metres for this toile). I used corozo buttons from Hawes and Freer and while I did put all the buttons (and buttonholes) that the pattern called for, I omitted the bottom button on my subsequent version (this purple one).

Since this was a toile, which I really didn’t intend to finish, I didn’t put a lot of thought into pattern placement of the check. My big regret is not paying more attention to how the check would fall over the back pleat (fortunately, I don’t have to look at it). Otherwise, I did a half-assed job of matching the plaid by ensuring that I cut my pattern pieces out in the same spot on the fabric.
My recipe for check or plaid Tarawi Shirt:
Cut 2 cuffs on bias (interface these ones),
Cut 2 pockets on bias,
Cut 1 collar band on bias (interface this one),
Cut 1 yoke on bias,
Cut placket on bias
Because of the bust-dart, matching the side-seams is always going to be futile. The button band is created by notching the front of the shirt, which means that a bias-cut button band doesn’t work here.
Optional extra, cut 2 of cuff, 1 collar and 1 collar band, 1 yoke from a lining fabric. You won’t interface any of these, and they’ll end up under the collar, inside the collar and inside the cuffs and on the inside of the yoke.

And now, I’m on the lookout for snuggly brushed fabric (my ultimate would be a red and pink check)! I’m thinking this will be my go-to weekend shirt, and it’s a great match for my Shoalhaven Shacket!

1 comment